Hello!
I'm back to update you on how my adaption of New Look 6224, which I wrote about last time, turned out. I was very pleased with my short sleeved version, and I have already worn it quite a lot, but wondered how it would work without sleeves!
The pattern is so nice to make and the pattern has several variations, but not a sleeveless version, which is probably my absolute favourite hot weather wear.
I cut the pattern in exactly the same way, setting aside the sleeve pattern pieces, of course, having decided to just bind the armholes with some home made bias binding. This is so easy to make it really is worth the effort.
The easiest way to make it is with a special bias binding maker. These come in different sizes, and I have a few different ones. You will need to cut some strips of fabric on the bias, or diagonal, of the fabric. The package will tell you how wide they need to be for the bias binding maker you have. To get an idea of how long to make the strips, measure around the armhole on the pattern and add a few more centimetres to give you some wiggle room.
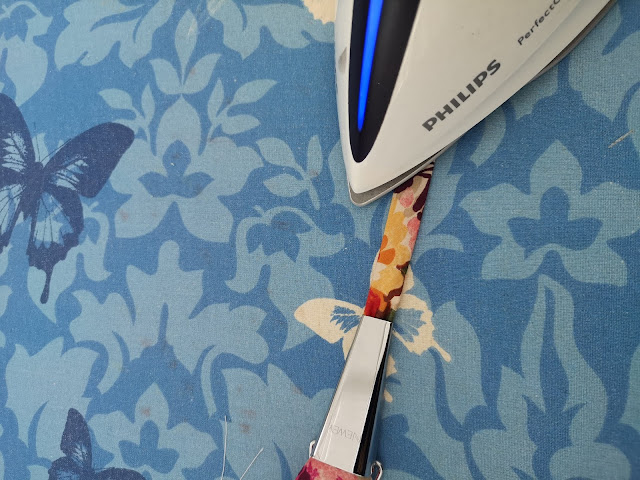
Take the fabric strips to the ironing board and have your iron on a good steam setting. Cut one end of the fabric strip on the diagonal, to make it easier to feed through the wide end of the maker. You want to have the right side of the fabric facing outwards. If you need to ease it through a bit it is easy to do so with a needle or pin in the grove on the underside. You want to have about half a centimetre sticking out at this stage.
Turn the bias binding maker over so it's right side up and grasp the ring handle in one hand and the iron in the other hand. Press the end of the fabric with the very tip of the iron to hold it firmly and then steadily pull the handle so the maker slides along the fabric and the neatly folded bias binding will appear at the other end. You will slide the iron along the strip of binding as it appears, 'chasing' the binding maker. Press the bias binding as soon as it appears, otherwise it will quickly unfold itself! Be very, very careful with the hot iron though, so as not to burn yourself!! (Ask me how I know this...)
Leave the bias binding for a few minutes to cool completely and then it's ready to use! If it all goes wrong, press the strip flat and try again. Trust me, it gets easier with practise!
If you are adapting a pattern with sleeves to a sleeveless one you need to take into account the fact the pattern will have a 1.5cm seam allowance at the armholes, and bias binding is normally applied with a much narrower seam allowance. I forgot this the first time I did my sleeves and whilst they looked fine, they were feeling a little bit tight by the end of the day, so I unpicked them the next day and did them again, placing the first fold of the bias binding along the 1.5cm sewing line. The result is slightly wider armholes, which are perfectly comfortable.
Apply the bias binding in the usual way and then turn to the inside and topstitch close to the outside fold. Give everything a good press and ta dah! You've made a sleeveless dress. Here it is! I must say I am rather relieved it doesn't actually look like a pair of curtains that I was worried it might do!!
I am so pleased with my new dress and I will certainly be making this pattern again! I am going to try the three quarter length sleeves next, ready for the autumn weather!
Donna x


Thank you for this! It's very helpful, especially the bit about taking the seam allowance into account. I'm definitely going to give it a try.
ReplyDeleteYes, I hadn't realised what a difference that little extra bit of seam allowance would make! Do let me know how you get on!
Delete